Excel Autofill: 5 Time-Saving Tricks Most People Don't Know
Excel's Autofill feature is like having a personal assistant for data entry. You've probably used it to fill a series of numbers or dates by dragging the little square in the corner of a cell. But Autofill can do much more than that.
These 5 advanced Autofill tricks will save you hours of manual work, whether you're creating reports, managing inventory, or organizing schedules.
What Is Autofill? (Quick Refresher)
Autofill lets you extend patterns in your data by:
- Selecting a cell with content
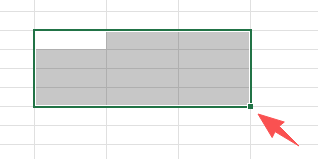
- Hovering over the bottom-right corner until you see a small black square (the "fill handle")
- Dragging the fill handle up, down, left, or right
Trick 1: Fill Series Without Dragging (Double-Click Shortcut)
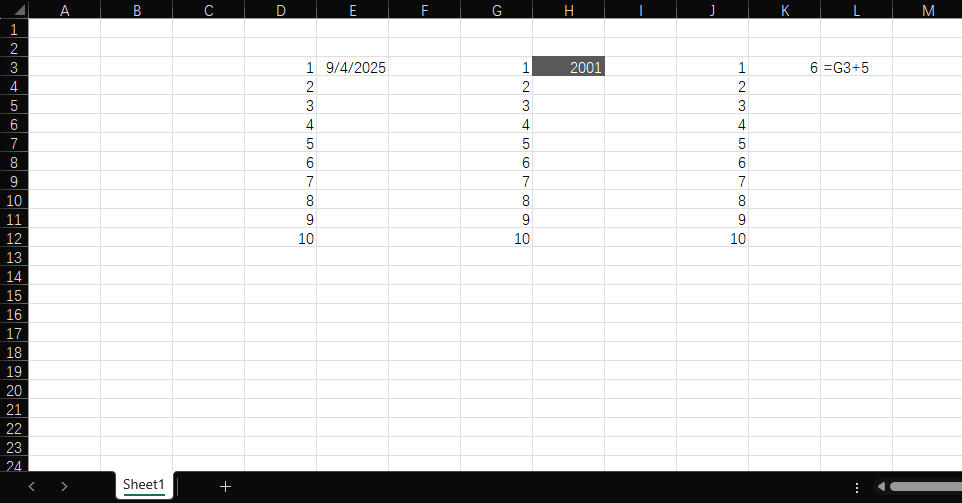
Dragging the fill handle down hundreds of rows is tedious. Instead:
- Enter your starting value (e.g., a date, number, or formula)
- Make sure there's data in the column to the left (this tells Excel where to stop)
- Double-click the fill handle instead of dragging
Excel will automatically fill down to the last row with data in the adjacent column. This works great for:
- Applying formulas to entire columns
- Extending date sequences
- Copying formatting across rows
Trick 2: Create Custom Lists for Repeating Data
If you regularly type the same sequence (like department names, project phases, or team member names), create a custom list:
- Go to File > Options > Advanced
- Scroll down to "General" and click Edit Custom Lists
- In the "List entries" box, type your sequence (one item per line) Example: Marketing, Sales, Support, Finance
- Click "Add" then "OK"
Now when you type the first item and drag the fill handle, Excel will repeat your custom sequence.
Pro tip: You can also select an existing range in your worksheet and click "Import" to create a custom list from your data.
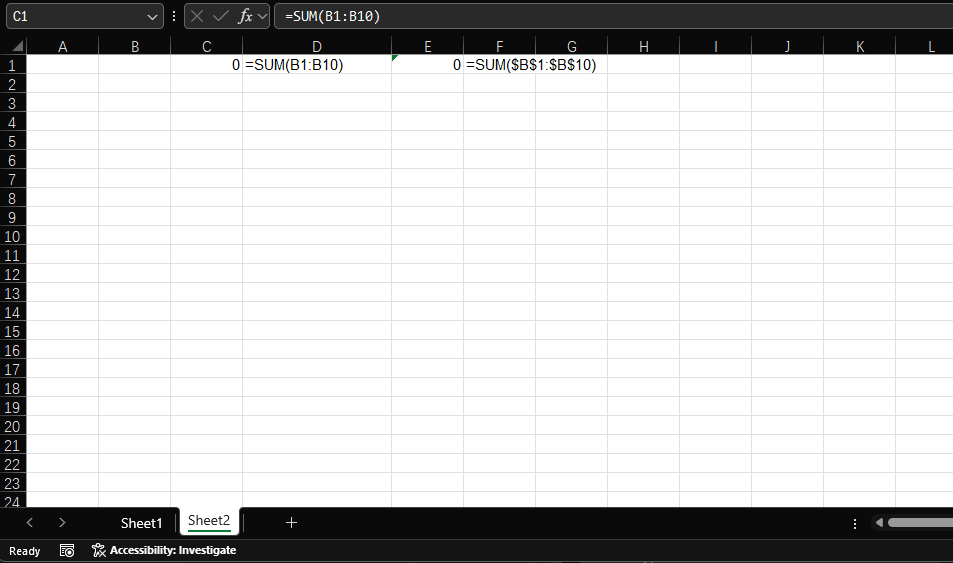
Trick 3: Fill Formulas Without Changing Cell References
By default, dragging a formula with Autofill changes cell references (e.g., A1 becomes A2, A3, etc.). To keep references absolute:
- Create your formula with absolute references using
$Example:=SUM($B$1:$B$10)(the $ locks the range) - Drag the fill handle as usual—references won't change
For mixed references (lock row or column only):
=SUM($B1:B$10)(locks column B and row 10)
This is perfect for:
- Calculating percentages against a fixed total
- Applying the same range across multiple formulas
- Creating consistent reports with fixed reference points
Trick 4: Fill Months, Weekdays, and Dates Smartly
Autofill recognizes date patterns and can create:
- Sequential dates: 1/1/2023 → 1/2/2023 → 1/3/2023
- Same day next month: 1/15/2023 → 2/15/2023 → 3/15/2023
- Weekdays only (skipping weekends): Use right-click drag
How to use:
- Type your starting date (e.g., "Jan-23" or "Monday")
- Drag the fill handle
- For special date patterns:
- Right-click while dragging
- Choose from options like "Fill Months", "Fill Weekdays", or "Fill Years"
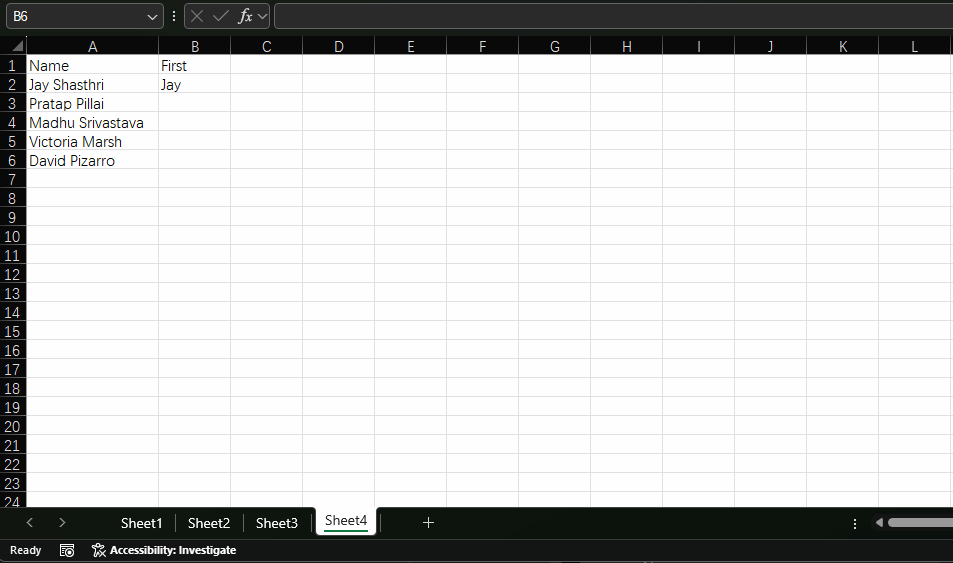
Trick 5: Flash Fill for Text Transformation (Excel 2013+)
Flash Fill (a cousin of Autofill) recognizes patterns in text and automatically completes them. It's magical for:
- Separating first and last names from full names
- Extracting numbers from text (e.g., "Order 123" → "123")
- Combining text from different columns
How to use:
- Type the first example of your desired result Example: If A1 has "Doe, John", type "John" in B1
- Press
Ctrl+E(Windows) orCmd+E(Mac) - Excel will fill the rest based on the pattern
Bonus: Autofill Keyboard Shortcuts
Ctrl+R: Fill right (copies leftmost cell to the right)Ctrl+D: Fill down (copies top cell to the bottom)Ctrl+E: Flash Fill (as shown in Trick 5)
These shortcuts work when you select a range with your starting value in the first cell.
For Google Sheets Users: Similar Features
Google Sheets has most of these features with slight differences:
- Double-click fill handle works the same way
- Custom lists: Go to Data > Data validation > List of items
- Flash Fill: Use the same
Ctrl+Eshortcut - Date filling: Right-click drag offers similar options
Final Practice Exercise
Try this to test your skills:
- In cell A1, type "Q1 2023"
- Double-click the fill handle to create Q2 2023, Q3 2023, etc.
- In B1, type a formula
=A1 & " Report" - Use
Ctrl+Dto fill the formula down - Watch how Autofill saves you from typing each quarter manually!
Have a problem with Excel or Google Sheets?
Tell us about the issue you're facing, and we'll create a step-by-step guide for it.